How to speed up Windows shutdown

Shutdown has a function to disable hardware that is still active. All temporary data in RAM will be lost.
That's why shutdown has a longer process, when compared to sleep or hibernate features in Windows 10 as I've discussed.
But yes, actually the shutdown speed depends on the specifications of the PC / laptop used.
Make an average, from my experience of about 1 to 2 minutes (for standard computer specifications).
1 to 2 minutes, doesn't everyone like to wait that long right? Well, take it easy. There are several ways to speed up shutdown in Windows 10.
How to speed up the shutdown process in Windows 10
For this method we use the settings in regedit and optimize the computer before shutdown . Complete the following checks:
1. End Task All Applications in Task Manager
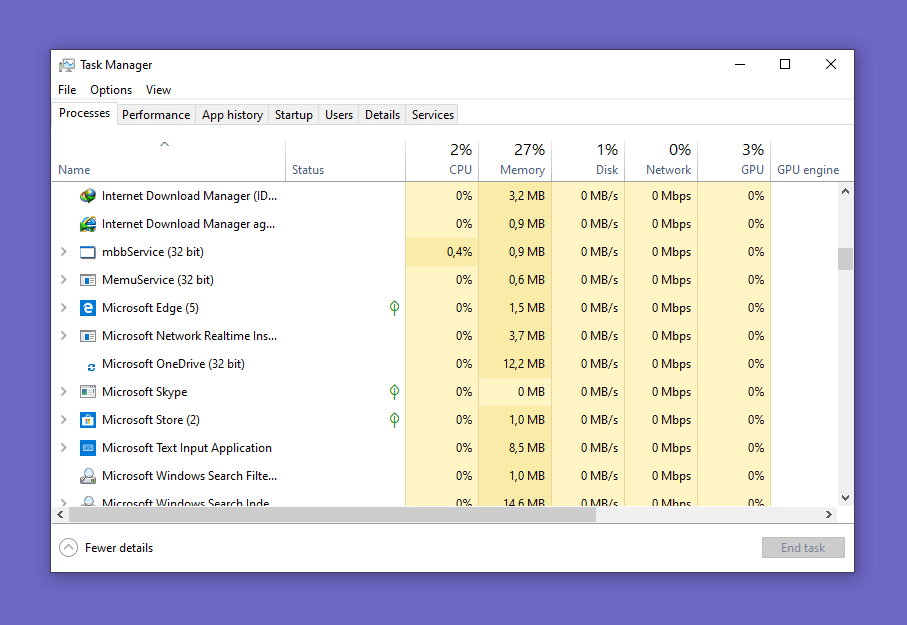
Most people often shutdown a computer without paying attention to the applications that are running first.
Well, this can make the shutdown process even longer.
Why? Because when we want to turn off the computer, the data currently running must be deactivated first by the processor. So it works twice.
Try the End Task application that is running. Click the Ctrl + Alt + Del then enter the process menu . There End Task all applications that you open.
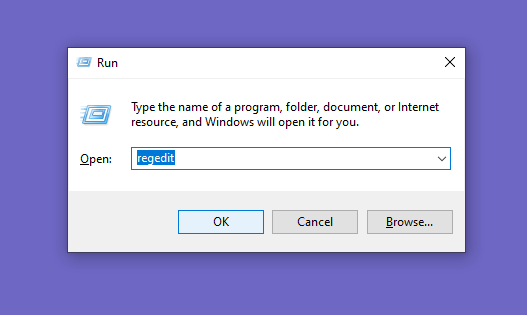
2. Set the Registry Service in Windows 10

In Windows 10 there are many features of the system running, or more commonly called service .
We can set up a registry of services that exist, so that faster is disabled when the shutdown is running.
Here's how:
1. First, please click the Windows + R button
2. Then type regedit and click OK / Enter
3. Then enter the directory which is HKEY_LOCAL_MACHINE \ SYSTEM \ CurrentControlSet
4. Open the Control folder then on the right, look for the WaitToEndServiceTimeout registry (or something like that)
5. Next change the value to 1200
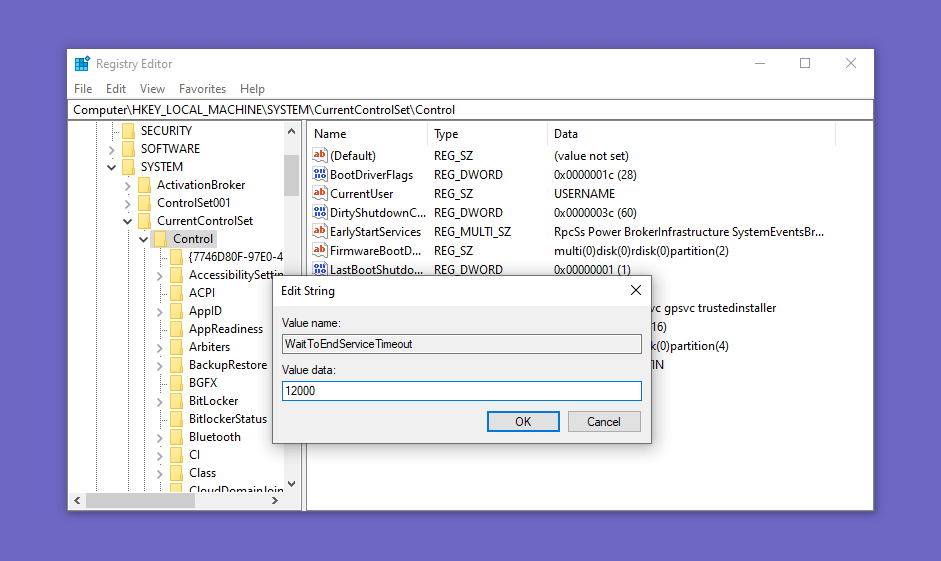
The setting value of 1200 was 12 seconds. It can be adjusted by yourself, but it is recommended not to be less than 700 values .
3. Set the Application Registry
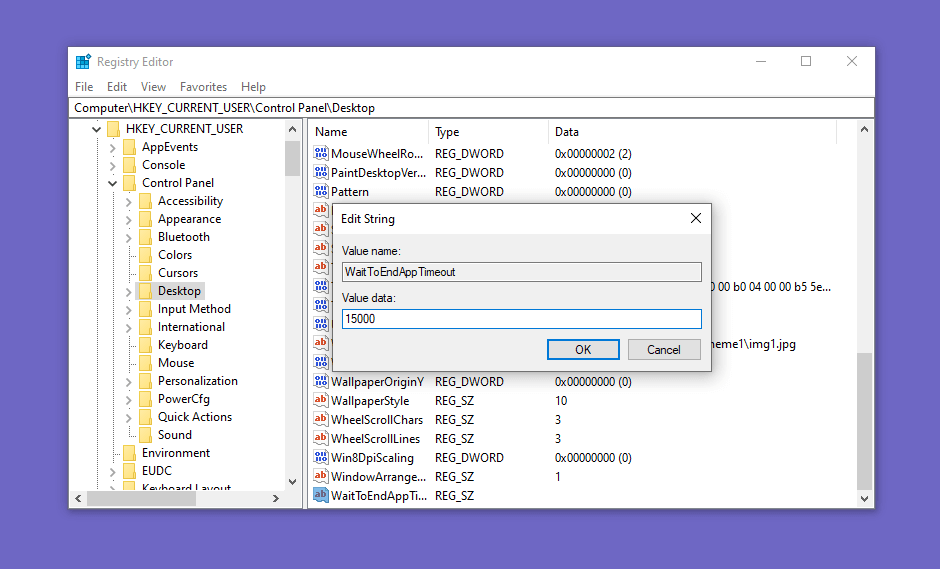
For the previous settings for service . Well, for this we set specifically for the registry of the application.
In general, the goal is the same. But for the registry this application is more emphasized. Because it is more effective.
Follow these steps:
- Open regedit
- Then enter the HKEY_CURRENT_USER \ Control Panel \ Desktop directory
- Search for WaitToEndAppTimeout (or something like that)
- Please change the value to 1200
Not finished, right click on the right> Select New string value > And name it HungAppTimeout. Set the value of the registry to 15000. Click OK.
Then create a new registry again as before> Select New string value > Name AutoEndTask. For the value set to 1. Click OK.
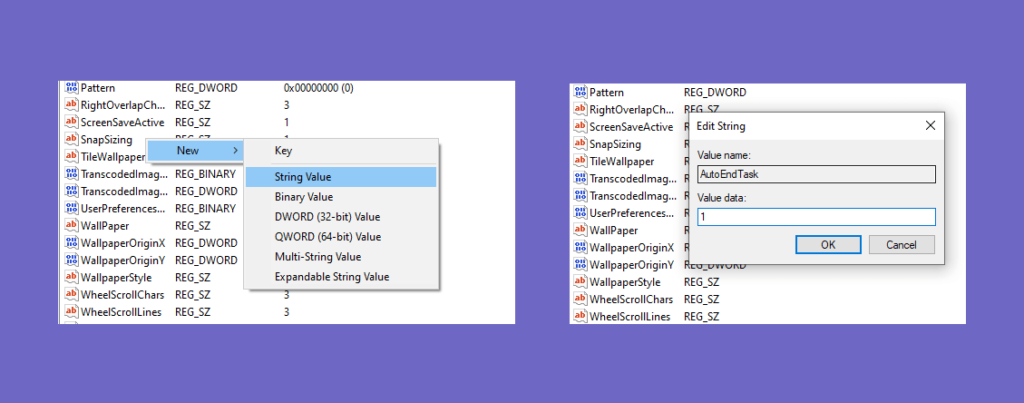
This setting functions to set the application to close faster. But remember, if you use this method do not forget to save the job before shutdown 😀
4. Use SSD
I have suggested this from the beginning, though, using SSD to improve the performance of your computer / laptop.
SSD itself has a very different effect. Approximately 2 times the performance of conventional storage. Guaranteed for shutdown will be very fast.
This is based on experience too. Because I myself use NVME SSD with Read Write speeds of more than 1000Mbps. If the shutdown is only 3-5 seconds, only 😀
The final word
That's a few tips to speed up shutdown in Windows 10. Please try one by one. And finally, if there is a budget, it's better to just upgrade to SSD.
May be useful.
Post a Comment